Pitrex baremetal FAQ: PiTrexBM_FAQ.txt
A short video tutorial can be found on you tube, or:
Virtual machine for Virtual Box (personally I use: VirtualBox 6.1.18 for OSX).
(nah, personally I use “Parallels” – that is for my taste more responsive VM)
User: ubuntu
Password: ubuntu
Base: Ubuntu 16.04.07 LTS downloaded from: https://www.linuxvmimages.com/images/ubuntu-1604/
The toolchain to cross compile was taken from: https://developer.arm.com/tools-and-software/open-source-software/developer-tools/gnu-toolchain/gnu-rm/downloads
(although the newest version produces a linker error “_kill” – I chose NOT to investigate this – I just copied my old version (1 1/2 years old) and with this the toolchain still works fine – I love it when new versions react differently from old ones!!!)
To compile/build something:
– open a terminal (right click on desktop)
- go to the source directories
(e.g. cd src/pitrex/pitrex/software/vecx.emulated) - do a make clean, that is write
make -f Makefile.baremetal clean - than compile the current “dir”
make -f Makefile.baremetal - within the directory an “image” file was produced, in the above example that would have been “vecxemul.img”
- this has to be placed on your baremetal sd card
Here it gets a bid “trickier” personally I mount the SD card on my host side, and share that folder to the virtual machine. The makefile also includes (a conditional) copy sequence to copy the image to that location.
But in order for that to work for YOU, you have to configure the shared directories/names/mount places in virtual box and you system.
For me (with the correct configuration) it is very swift doing. I insert the sd card in the reader, “make” and than take it out and input into my pi – this is a matter of 5 seconds.
Tip:
A “norton commander” or “mu commander” or “total commander” like tool is present on the ubuntu image, called “crusader”, the second icon from top on the left side of the desktop. Copying and navigating is very easy with that. I also use the editor that comes with crusader to do all my editing under linux – but you “vim – pros” probably will do it differently.
HOT TIP
If you really intend to develop, I urge you to get an USB / serial interface, e.g.:
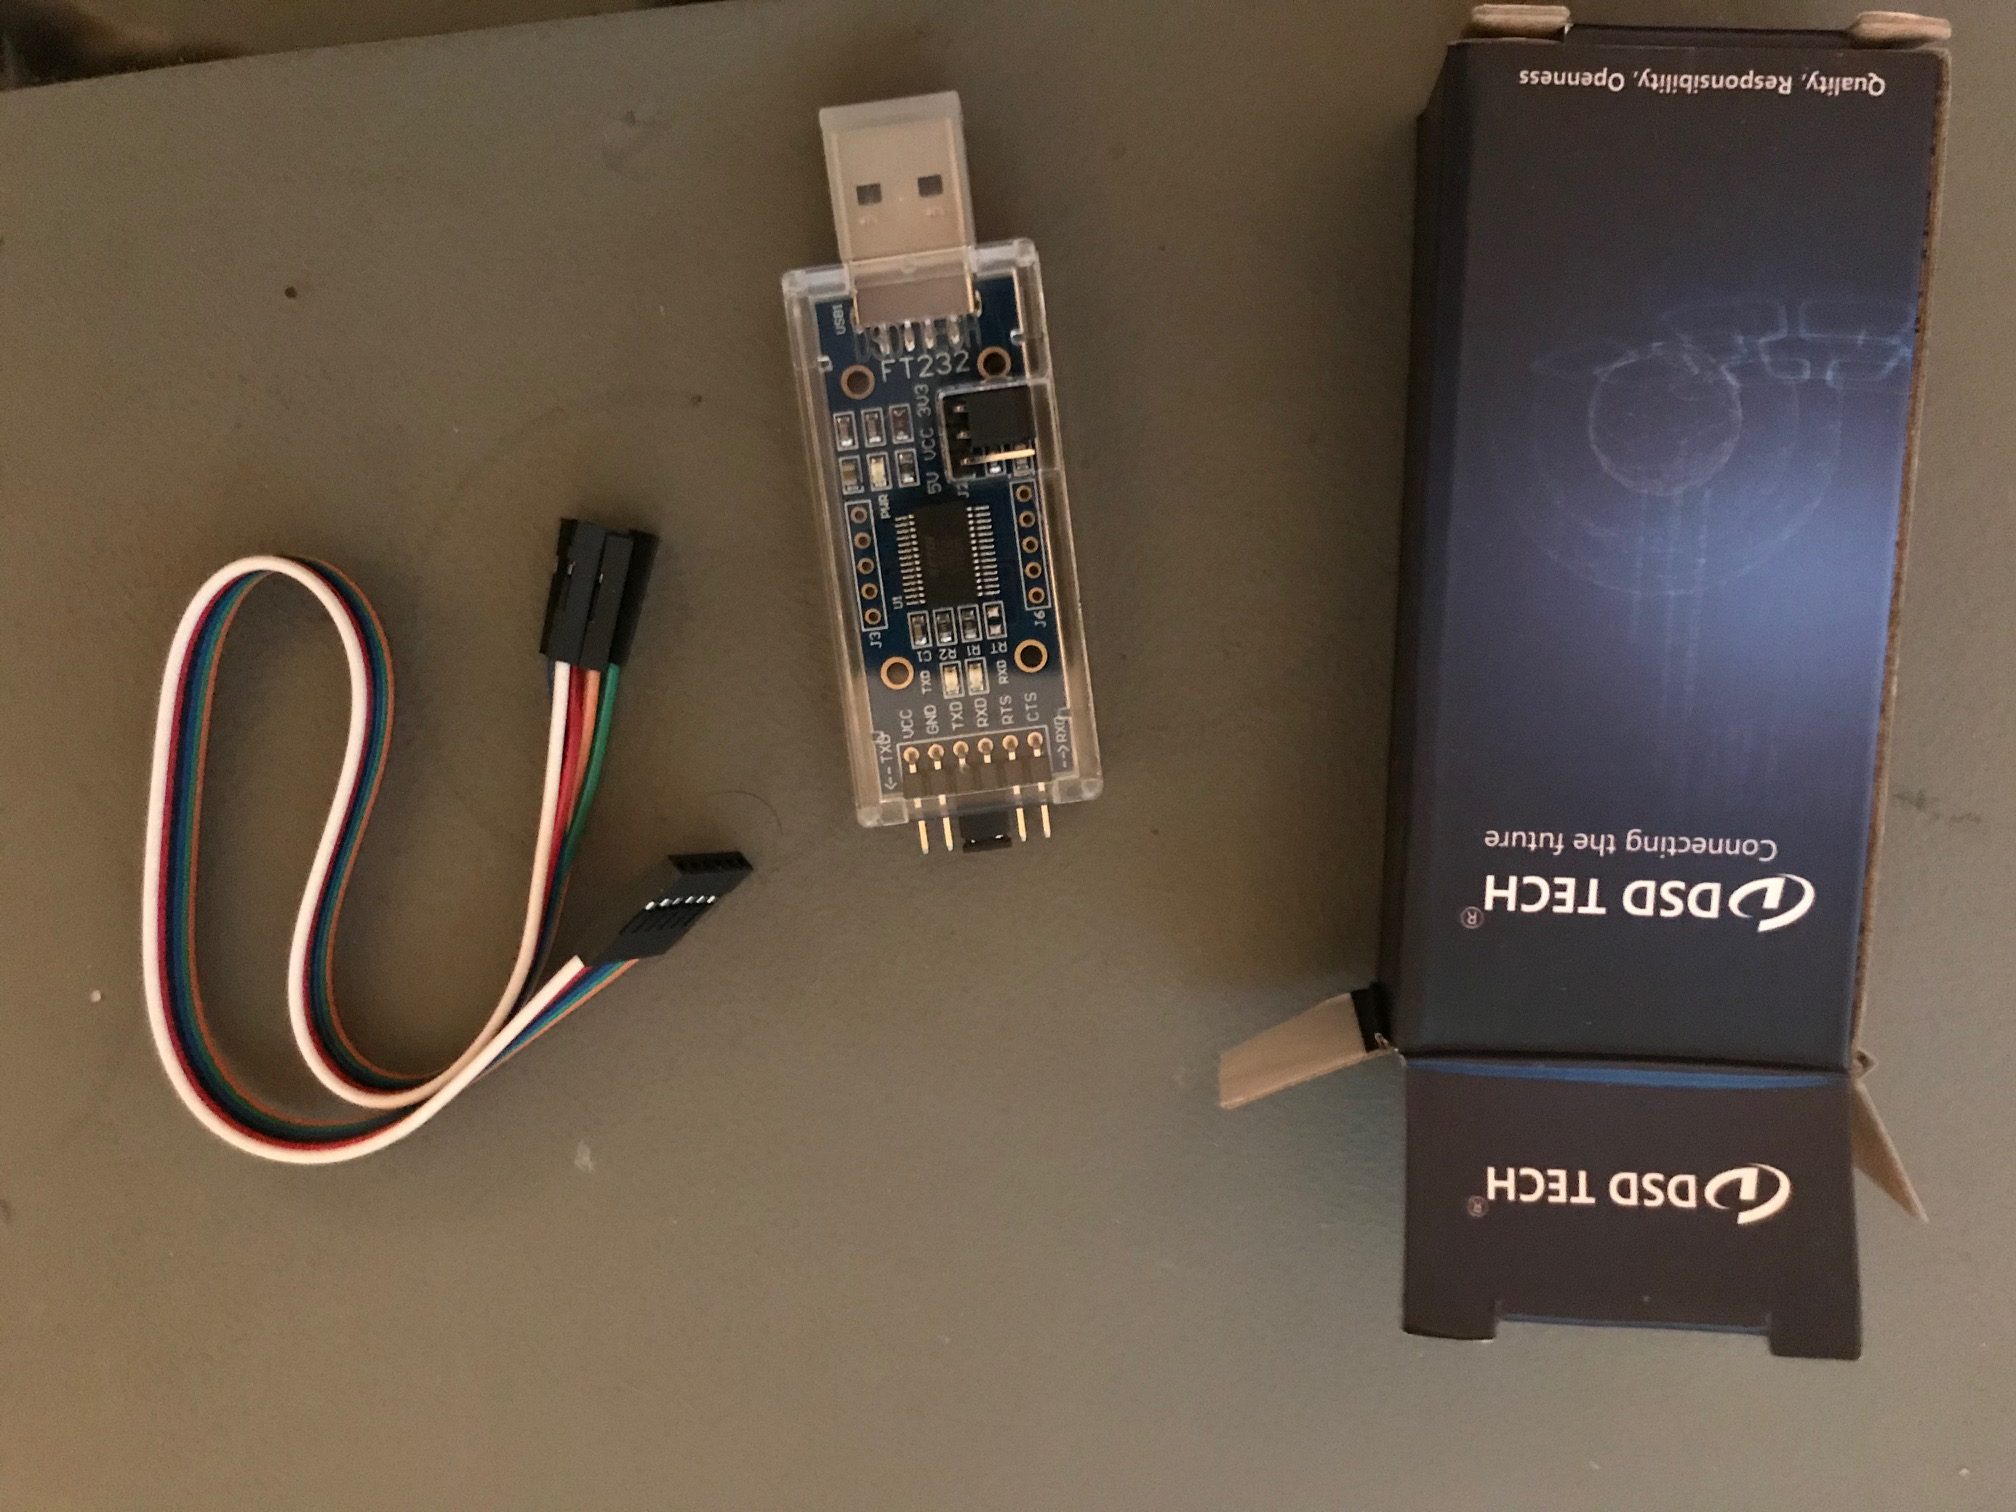
You need to attach the GND, TX and RX cables like shown here:

with the PiTrex/PiZero:
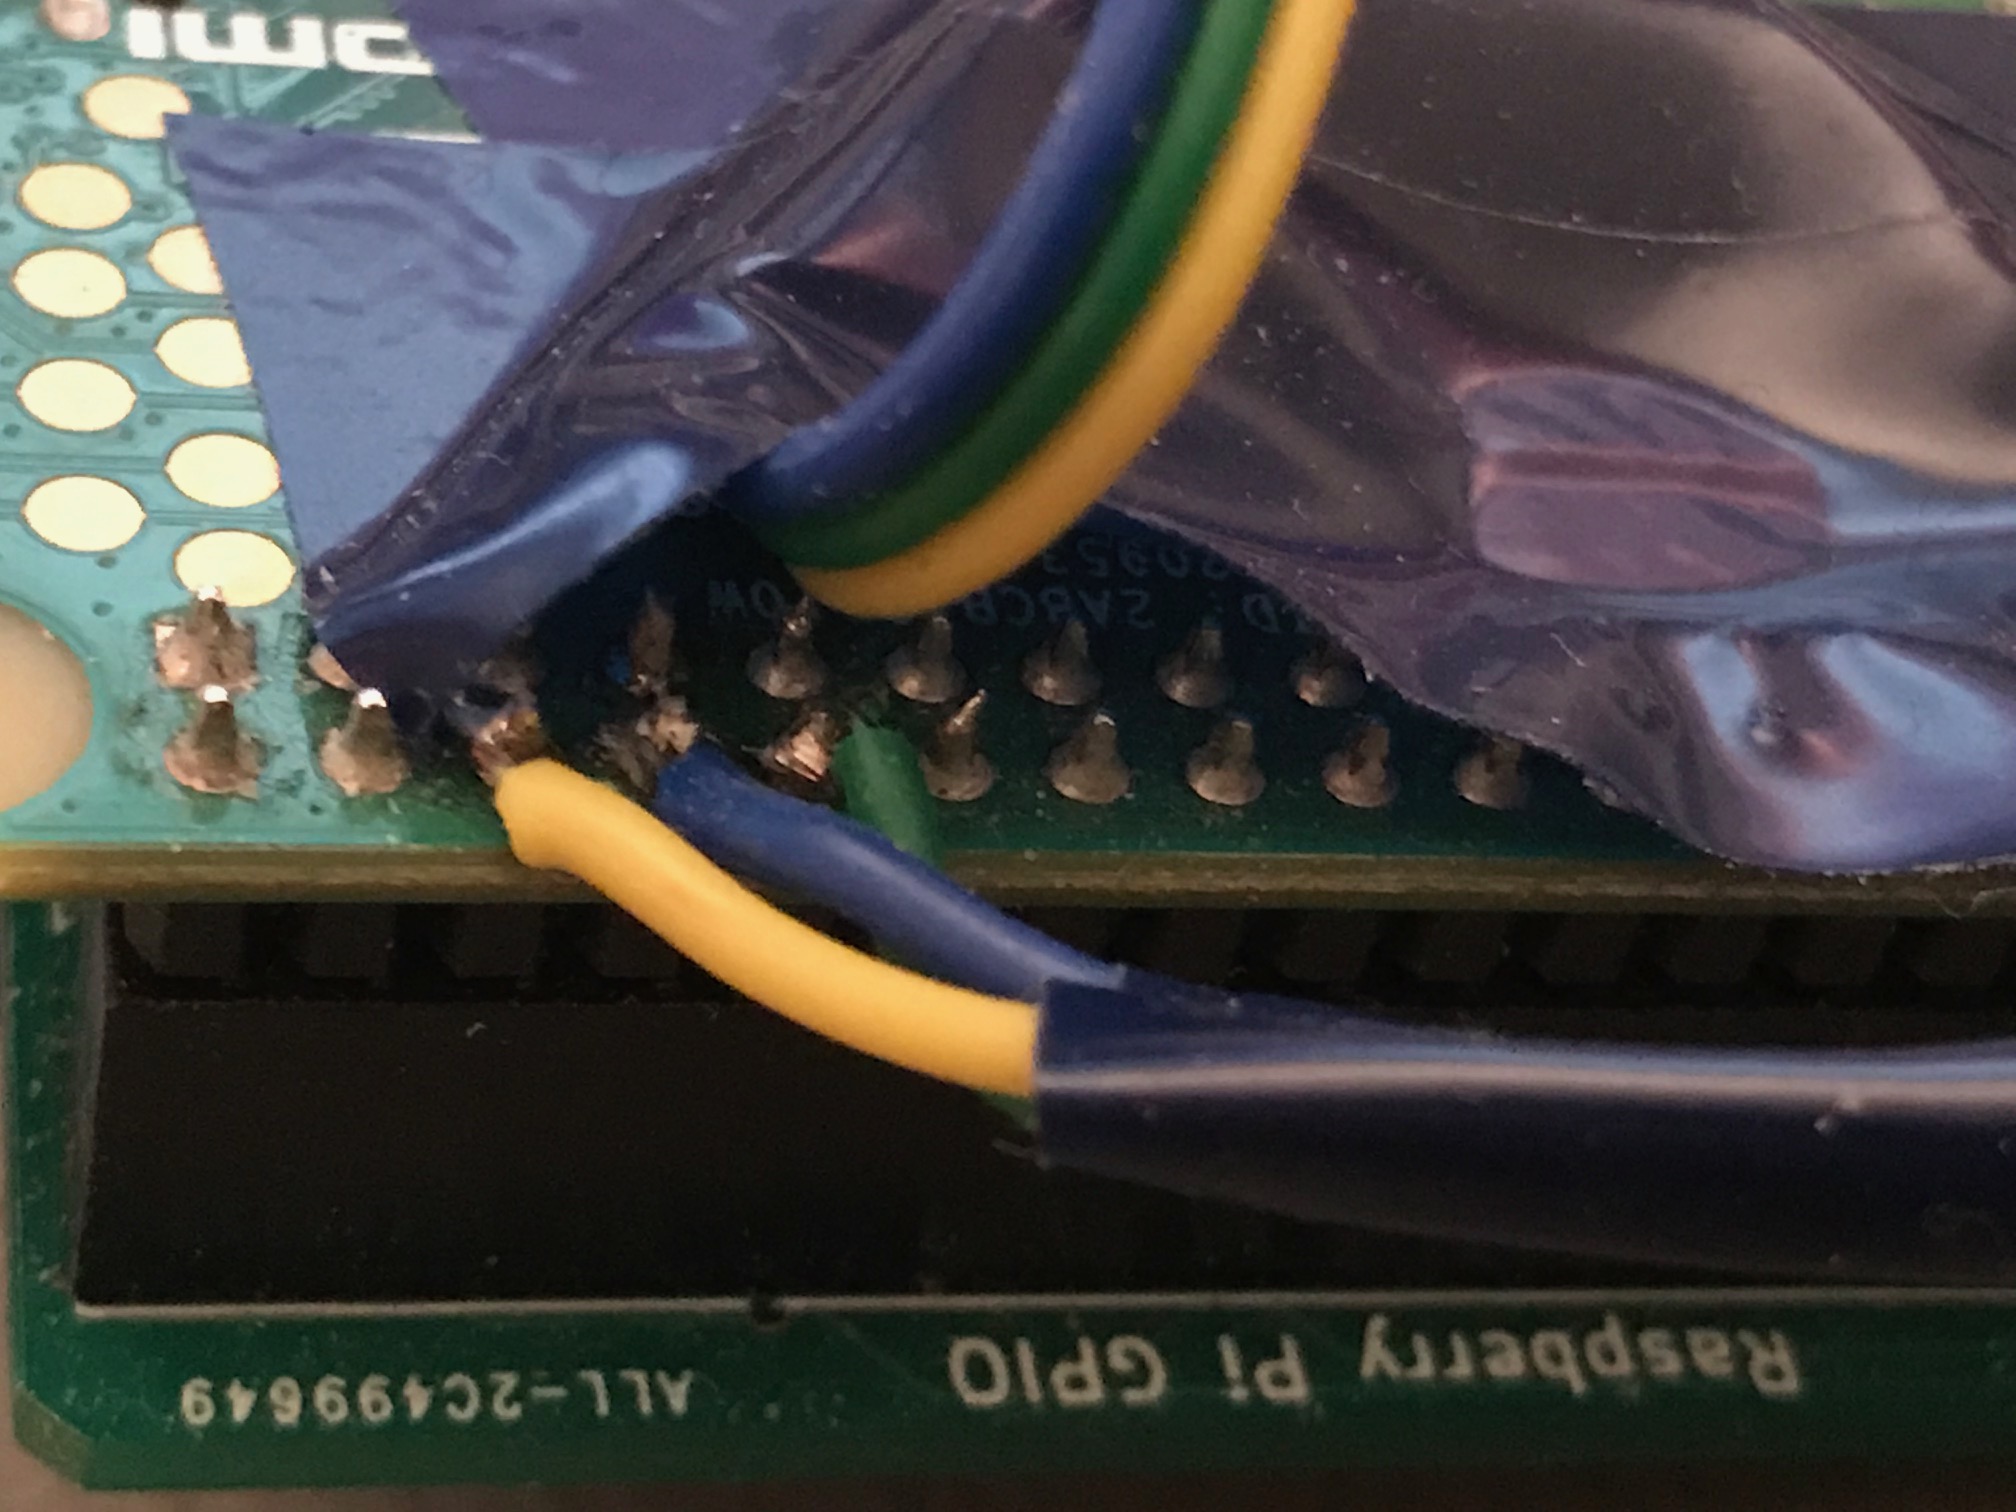
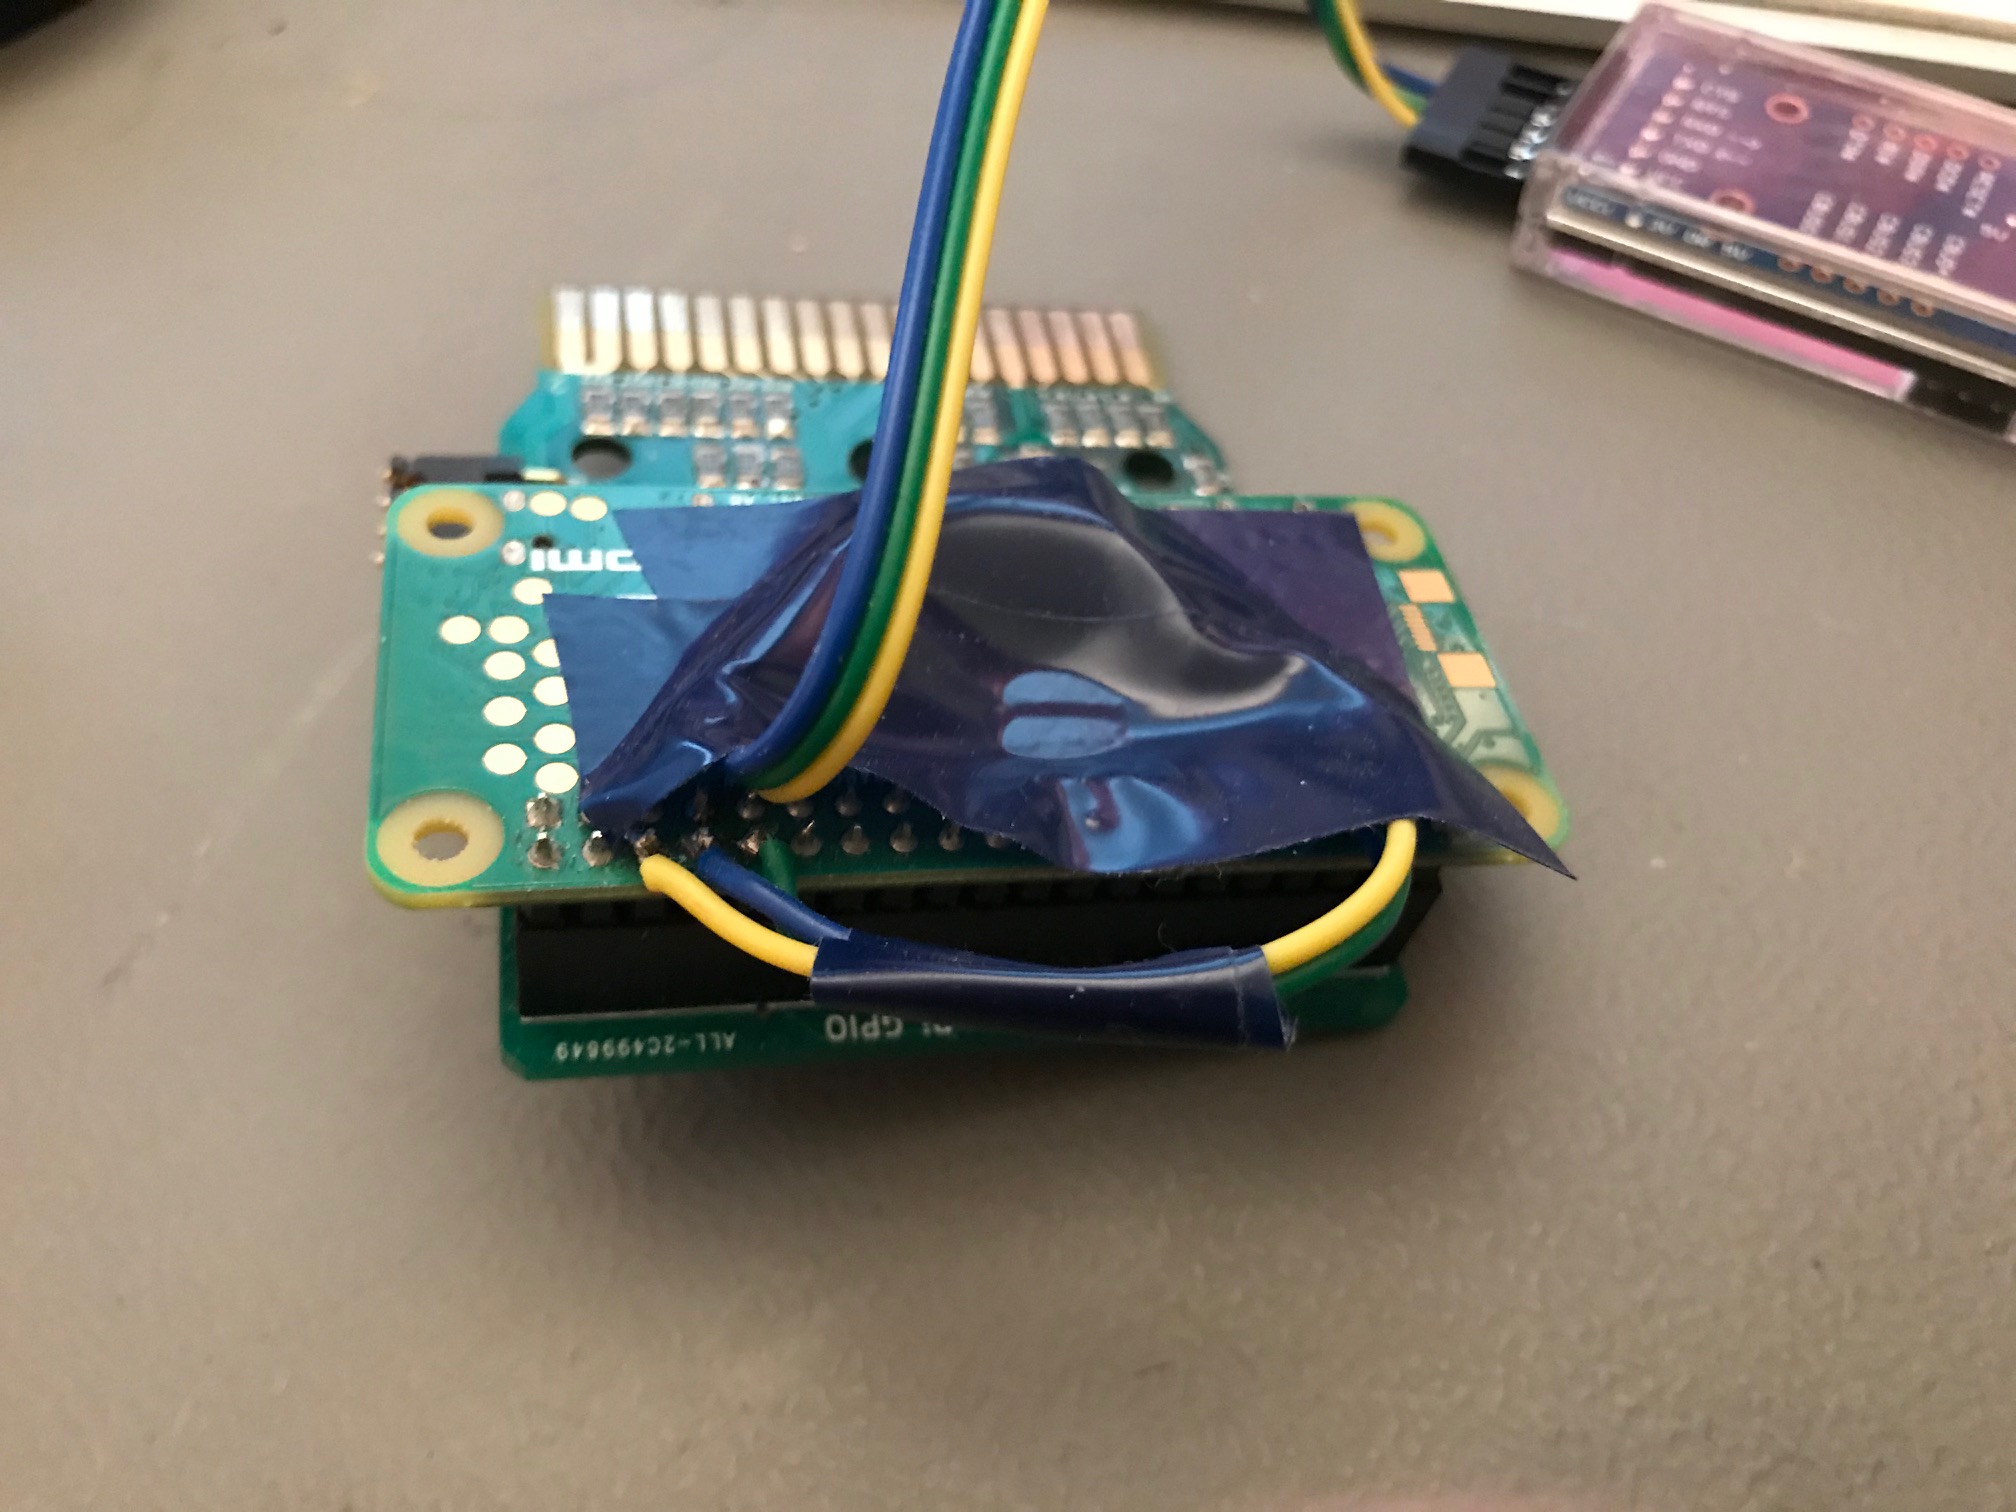
I did not solder a real “connector” – just the bare wires… and with the time they get lose. After soldering them three times, I but a tape around them.
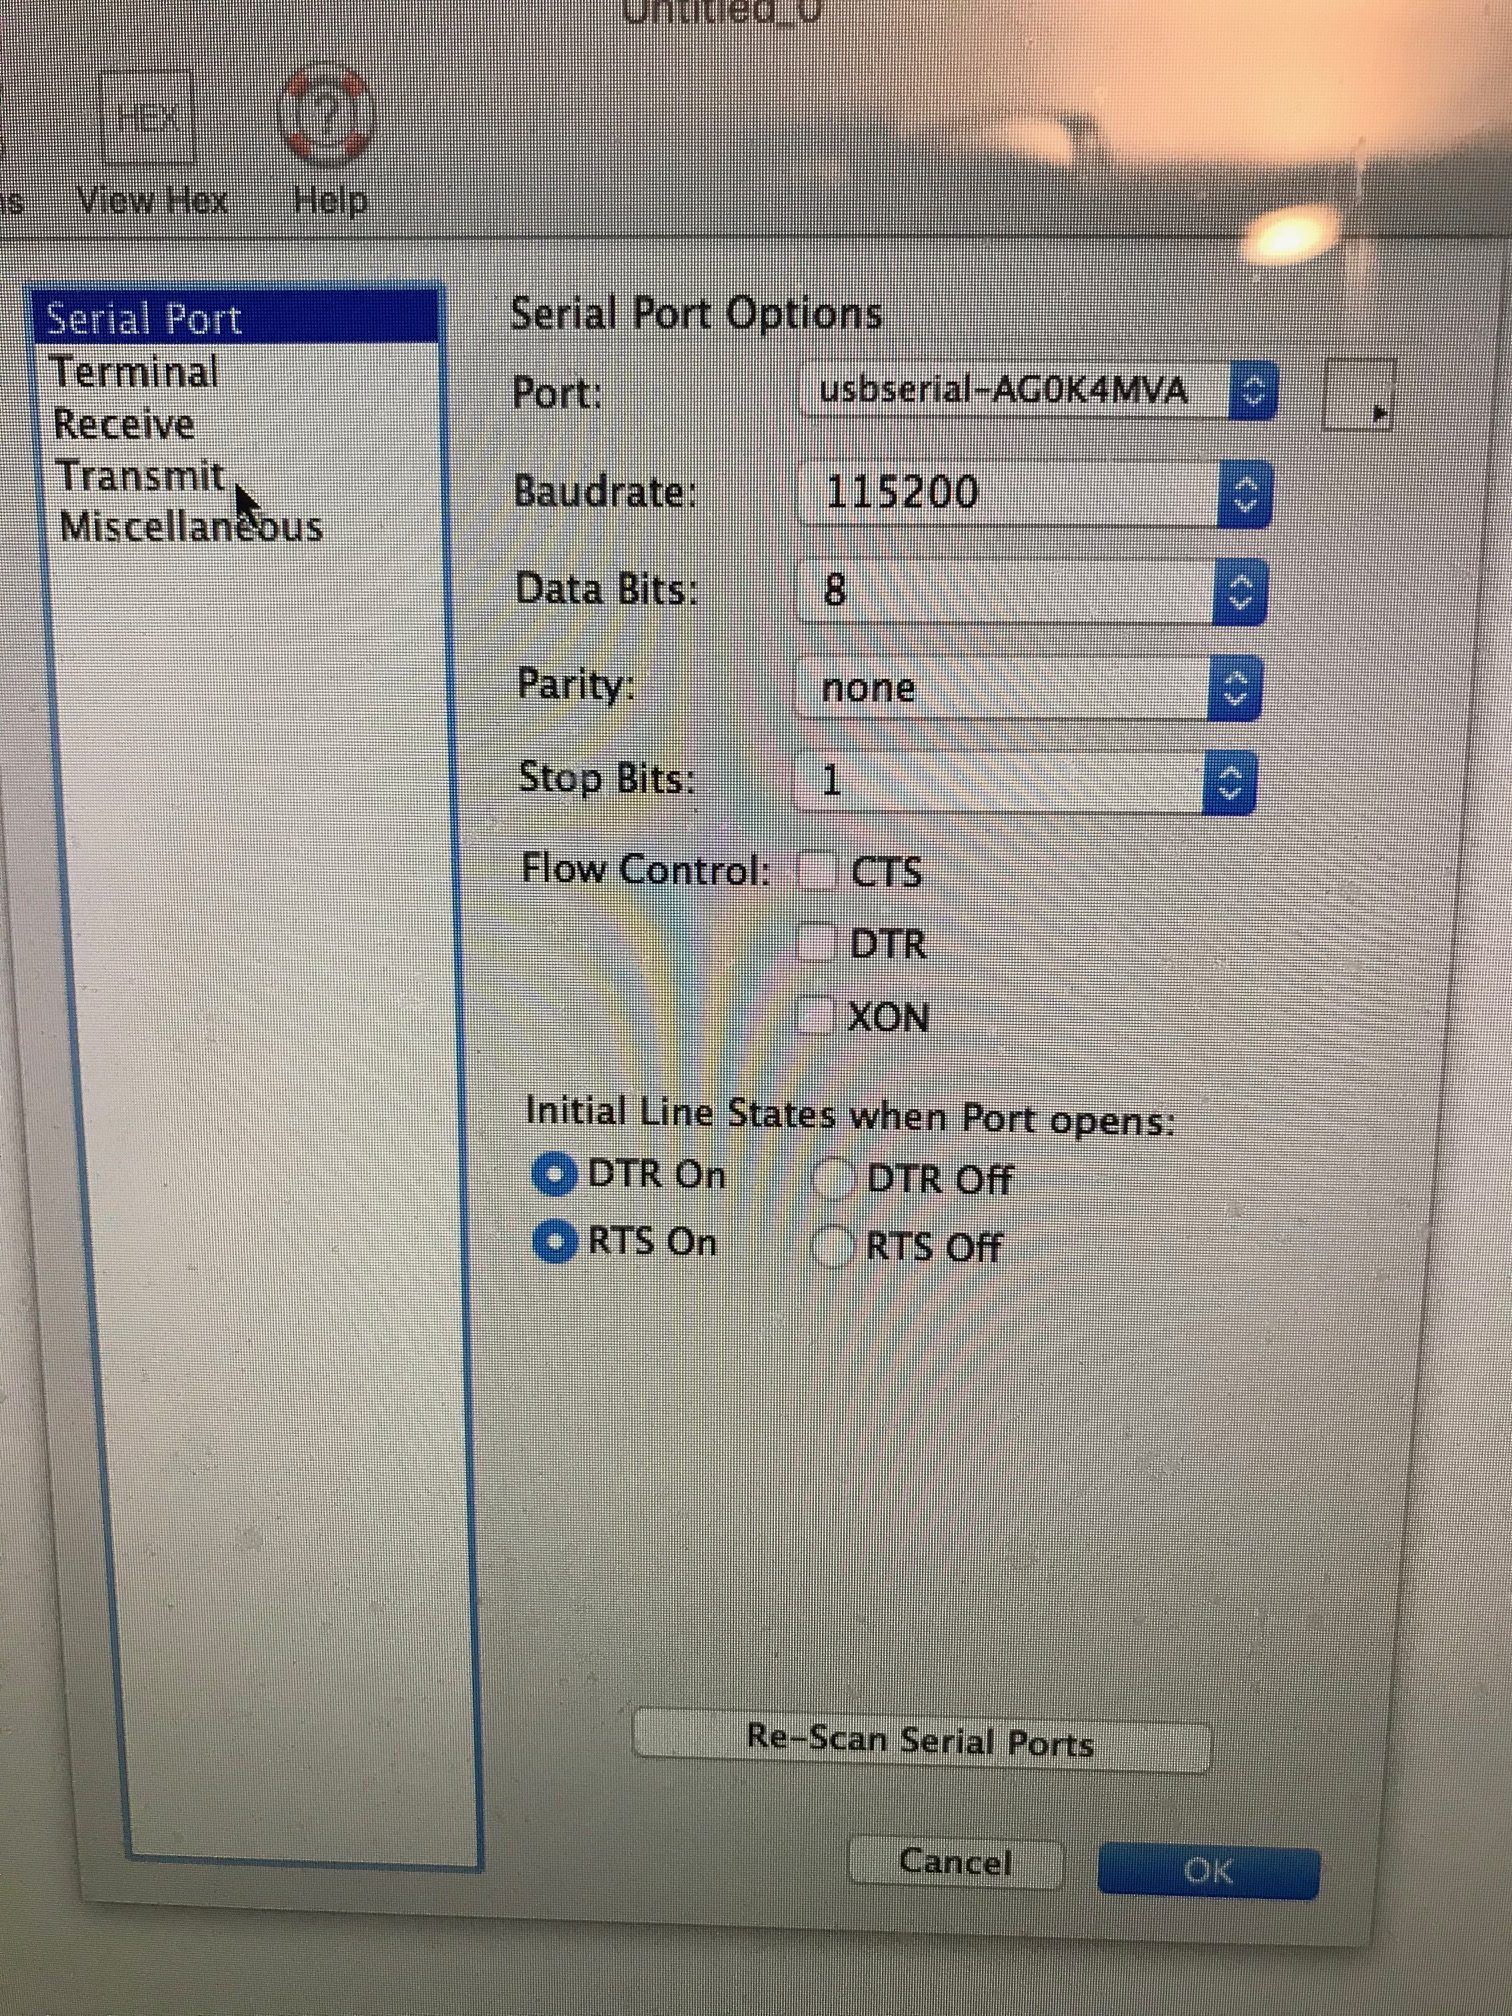
With that done, you can start a terminal on your computer (USB connection provided) with following parameters:
An when the PiTrex starts – you get some information:

Now… every printf(…) you do can be viewed online in your terminal!