Just a short update. Vectorblade is still alive and kicking.
I have created all 100 levels I wanted. These must still be fine tuned, but it is a huge step for me, because level editing was really repetetive and thus quite boring. I also started adding new stuff (like e.g. 5 new Bonus items…)
On the PCB frontend some good and some bad news.
Good news:
The “through hole” variant of the PCB is working like a charm.
I can use 48k, 96k and even 192k if I want to. Bankswitching is working good, saving and loading of stuff also works fine and is already integrated into the Vectorblade sources. I removed all saving code for VecFever and DS 2431.
Bad news:
I did a second design of the same PCB using only SMD components and I have as yet not been able to get that to work. I very much would prefer to go SMD, but my patience with myself and my hardware debugging capabilities is running out…
Bankswitching
Anyway, it seems finaly that all “old” memory problems are vanishing. A new problem is on the doorsteps though… I don’t know if I am able to fill all the space I have available!
The PCB (see last blog) can be configured to use the IRQ line of the cartridge port as address line A17. This enables us to switch between 4 banks, that gives “free” access to 4 * 48k = 192k of memory (courtesy of Mr Tuts, who first thought of this).
Right now I am VERY lavish with my coding and I barely scratch 90k – I don’t really know how to fill the rest in a sensible (and timely) manner.
Some more thoughts on how this bankswitching can be used – and what cannot be done.
Bank switch with 2 bits -> four banks possible, two bits of switching realized with:
a) bit 0 = PB6 (address line A16)
b) bit 1 = IRQ (address line A17)
The IRQ can from the vectrex side only be set thru the VIA chip, software IRQ control is only possible using either of:
i) ShiftReg
ii) Timer 1
iii) Timer 2
The “normal” state of IRQ is 1 (since IRQ is low active).
The “normal” state of PB6 is also 1
This means the “normal” ONE bank a vectrex cartridge has (start bank), is in this setup bank 3.
The normal bank 0 (when only using PB6 bank switching) is in this setup bank 2.
Bank 0 and 1 are the two “new” banks.
In my bank switching prototype I make use of Timer 1.
This also means:
a) within bank 0 and 1 you can not change T1 – otherwise the interrupt is cleared and a bankswitch occurs
b) you must not change the interrupt flag T1 and must not change the interrupt enable flag for T1 in bank 0 or 1
If T1 using routines are placed in an interrupt “invariant” place – these routines can (usually) be used to print/draw (e.g. BIOS routines) because:
On entry interrupt is SET (because we are in bank 0 or 1) if they “draw” using T1 interrupt they also LEAVE with interrupt SET, since usually the last thing they do is wait for T1 to expire, which SETS the interrupt again (always assuming T1 interrupt is enabled – of course).
Custom draw routines which are placed in “common ground” (this is what I call a ROM space where all banks share an EQUAL code portion) can usually also be used.
Smart draw routines can unmodified NOT be used – because they read the next data befor the timer 1 expires and are thus while reading in the wrong “bank”.
Also it IS possible to write draw routines without the use of Timer T1 and without the use of the ShiftReg (see Vide documentation, there I give an example). These routines can be used without any restrictions.
Example routines:
1 2 3 4 5 6 7 8 9 10 11 12 13 14 15 16 17 18 19 20 21 22 23 24 25 26 27 28 29 30 31 32 33 34 35 36 37 38 39 40 41 42 43 44 45 46 47 48 |
PB6_TO_0            macro
                    lda      #$DF                         ; Prepare DDR Registers % 1101 1111 1111 1111
                    sta      <VIA_DDR_b                   ; all ORB/ORA to output except ORB 5, PB6 goes LOW
                    lda      #$01                         ; A = $01, B = 0
                    sta      <VIA_port_b                  ; ORB = $1 (ramp on, mux off), ORA = 0 (DAC)
                    endm
;
PB6_TO_1            macro
                    lda      #$9F                         ; Prepare DDR Registers % 1001 1111 1111 1111
                    sta      <VIA_DDR_b                   ; all ORB/ORA to output except ORB 5, PB6 goes LOW
                    lda      #$01                         ; A = $01, B = 0
                    sta      <VIA_port_b                  ; ORB = $1 (ramp on, mux off), ORA = 0 (DAC)
                    endm
;
IRQ_TO_1            macro                                 ; interrupt DISABLED
                    lda      #%01000000                   ; bit 7 = 0, each other "1" clears the IEflag, bit 6 = T1
                    sta      <VIA_int_enable
                    endm
;
IRQ_TO_0            macro                                 ; interrupt ENABLED
; todo
; ensure T1 setup correctly
; - it usually is
                    lda      #%11000000                   ; bit 7 = 1, each other "1" sets the IEflag, bit 6 = T1
                    sta      <VIA_int_enable
; and now "trigger an interrupt
                    lda      #1                           ; a VERY short T1 timer
                    sta      <VIA_t1_cnt_lo
                    clra                                  ; a VERY short T1 timer
                    sta      <VIA_t1_cnt_hi               ; start timer
; by the time, the macros "leaves" the interrupt is set!
                    endm
switchToBank0:
 IRQ_TO_0
 PB6_TO_0
 rts
switchToBank1:
 IRQ_TO_0
 PB6_TO_1
 rts
switchToBank2:
 IRQ_TO_1
 PB6_TO_0
 rts
switchToBank3:
 IRQ_TO_1
 PB6_TO_1
 rts
|
Back a little to vectorblade. I again did some documentation, which – for whatever reason – I post here also:
Player shots
As of now player shots can be one of:
– 1 shots
– 2 shots
– 3 shots
– 4 shots
– blaster shots
– laser shots
(perhaps later 1* shot, 2* shot and 3* shot – which are “old style” shots)
– all of the above can be combined with one or two scoopies
– all of the above can be combined with or without autofire
There are in general 3 different behaviours possible:
– full damage
– partial damage
– timed damage
Full damage shots
1 shots and blaster shots are full damage shots.
This means the complete damage the shot can make are done when the shot hits an enemy.
The shot is removed from the object list and is gone for good.
Partial damage shots
2,3,4 shots are partial damage shots.
This means, when the shot hits an enemy the enemy recieves as much damage as it can absorb till destroyed. If the shot strength (2,3,4) is more than the enemy needs to be killed, the shot is reduced in strength and continues.
The internal handling of these shots has changed from beta 5 to beta 6. Befor the reduction was always done in “1” steps. Now the strength is consumed by as much as the enemy strength in one go. This gives more efficient collision detection. For optimization purposes, partial damage shots only are considered with “normal” enemies (see below).
For bosses and bugs, these shots are treated as “full damage shots” – since the said enemies have “many” hitpoints and most of the time they would be consumed fully anyway.
Timed damage
Lasers do damage over time. If the player shoots, the laser is active for a short amount of time (10 rounds). Each round the laser does a small amount of damage.
Timed shots with autofire fire continously!
Scoopies
Scoopies in general always shoot the same kind of shot as the player. If the shot type is partial, each of the three shots (scoopy left, player, scoopy right) can have different partial shots – depending on how much shot power has been used to destroy enemies.
Scoopy shots in general
Programmatically the scoopy shot is an extention of the player shot – and not a distinct “shot object” of its own. Each player shot has two “flags” whether it also has a scoopy shot on the right and/or/left side. The flag consists of 4 bits. These four bits also encode the “partial” shot information. The collision detection of the scoopy shots is also done in relation to the player shot (add/subtract certain position information)
Collision detection
There are different kind of enemy objects. For each kind the collision detection might be handled differently.
Enemy types:
– “normal” enemy
– shield enemy
– bug enemy
– boss
– swarm
– debris
Collision detection – normal enemy
The collision detection is realized in a subroutine call from each enemy behaviour. The subroutine in general tests only TWO selected shots if they hit or not. The shot selection (which of all possible shots should be used) to be tested is located in different parts of the code – depending on the stage of the game. The selection itself is realized in two macros called INITIALZE_SHOT_TEST_MOVE_BLOCK_1 (and 2). Per default these are called in the background star “moveTo” wait loop.
The selection considers information about the general location (e.g. if the shot is below the lowest enemy – it is not (ever) tested) of the enemies, whether it has hit in the round “before” and the general object distance of the other to be tested shot.
The collision subroutine finaly leads to another macro call “COL_DETECT_ENEMY_SHOTS_ENEMY” which realizes the collision detection.
For easier y testing, all enemy objects have the lowest (vector-) position as a starting point, the starting point also is always x = 0 -> centered!
After initial y position testing – the “interesting” x position testing is done using positive only coordinates (+$80 to all positions). This relieves some of the hassels dealing with two-complement 8bit numbers and Z, C and V flags.
In general the enemy ship (x)position is taken as the base. If the x=0 position of the ship is within the radius of the bullet (within one radius to the left or one radius to the right) the shot hit the enemy.
The radius (due to internal comparissons) used to be unique to each shot – it is not anymore.
(This made more sense, when I used 1,2,3,4 horizontal shot design instead of the now used vertical design) Because of the result of the above comparisson – if not hit, the routine knows whether the shot is to the left or right of the enemy. If scoopies are present, than a further testing can be done.
It is assumed that the radius for the scoopy shot is always the same as the “main” shot. If the shot is within 3 radius of the x position of the enemy (and a scoopy on the correct side is present) than the scoopy scored a hit. Depending on the shot type, damage is reduced from the enemy hitpoints, the shot power is reduced or the shot is removed.
Laser specialty
Due to the nature of the laser (and difficulty level – see below), the laser has to be shortened, when it hits an enemy (to the lowest enemy it can possibly hit). This makes it necessary to have a special treatment for the laser. The above logic is done for all enemies – but instead of removing hitpoints and destroying enemies – the location of the enmies is compared to a special laserEnemy position. After all enemies have been tested, the lowest enemy is known – and only that enemies is reduced (and maybe killed).
The location of the lowest enemy is given to the drawing routine of the laser, and it is only drawn up to that position. This logic is also done (if appropriate) for the left and right scoopy.
Collision detection – shield enemy
Same as above. But the shot is always fully consumed, and the shield does not take damage.
Collision detection – bug enemy
Nearly the same as above, but the final detection is made in another set of macros “COL_DETECT_ENEMY_SHOTS_ENEMY_BUG”. There some bug specialties are considered, like:
– bugs move differently – so the internal position is represented differently
– bugs can have up to 255 hitpoints (normal enemy max = 31), so the hitpoints are calculated differently
– due to optimization shots are not treated as partial shots
Collision detection – boss
Each boss has its own collision detection, since they are all “completly” different.
Due to optimization shots are not treated as partial shots
Collision detection – swarm
The Swarm of boss 1 is different in many aspects.
The sheer amount of enemies and the “near” position to the player, and the small size of the enemies makes it necessary to test each shot with each enemy. Chosing only “several” shots to test results in many shots just “going thru” the enemies. This strategy makes the swarm extremly sensitive to shots (more exact than any other collision detection used within VB).
It slows things down – but it has been balanced out, so that the refresh rate is within limits.
Collision detection – debris
Debris really is a special kind of enemy, which can not be hit by bullets.
No collision detection done here.
Difficulty level
As of now there are four difficulty levels:
EASY
NORMAL
HARD
IMPOSSIBLE
The difficulty has impact on the behaviour of player shots.
EASY
shot 1,2,3,4: damage per bullet = 3
blaster shot: damage = 10
laser: 2 damage per round, laser also is NOT inhibited by enemies, the ray goes thru all enemies above!
NORMAL
shot 1,2,3,4: damage per bullet = 2
blaster shot: damage = 7
laser: 1 damage per round
HARD
shot 1,2,3,4: damage per bullet = 1
blaster shot: damage = 6
laser: 1 damage per round
IMPOSSIBLE
shot 1,2,3,4: damage per bullet = 1
blaster shot: damage = 5
laser: 1 damage every second round
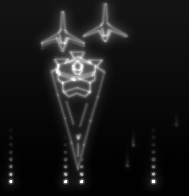
And finaly two more images of “new” enemies…
Level 54
Level 95 one of the “bug nirvana” levels…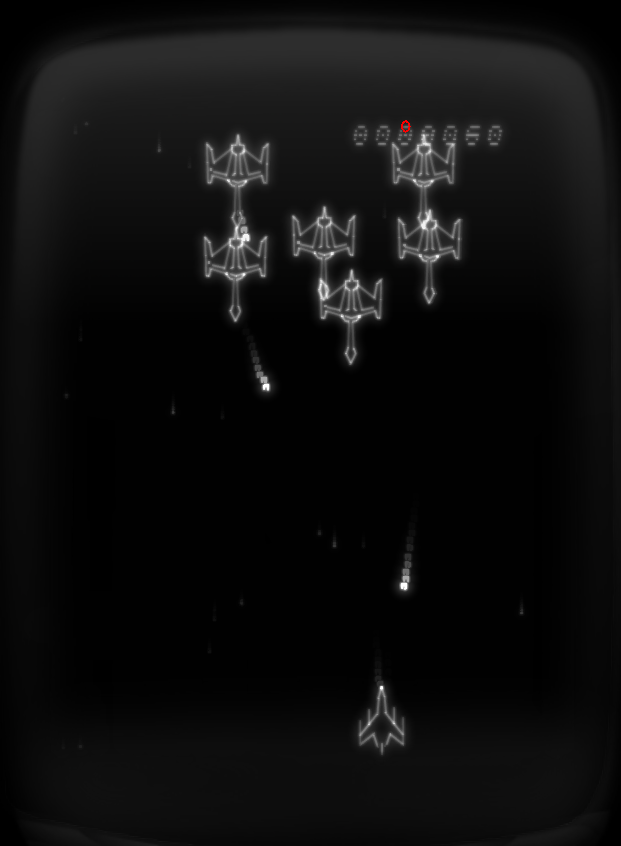
It seems the game will include MANY retro references, some that are present at the current stage… (can you catch them all?):
Warblade
Galaxians
Battlestar Galactica
Galaga
Starflight one
Sinistar
Star Wars
Star Trek
Star Trek NG
Douglas Adams
Major Havoc
No release date yet… there is still much todo!
Regards
Malban
your game is looking great!
however, i think appearance of the player’s ship could be refined. at the moment it looks like someone in a jet plane is going against a galaxian horde. is that intentional? eg. like time pilot it changes on different level?
maybe a redesign could make it more spaceship like? eg. start wars xwing or similar.
just my observation 🙂
looks like galaga+/- ship to me
I am excited about the game and how the gameplay will be at the end.
There have to be more shoot ’em ups for the vectrex.
Games looks better and better…
Some small observations: space ship looks too bold and static – even a little „animation“ like in Phoenix would be great. Game starts very slow but gets very hectic – maybe a bit balanced (not so slow at the beginning and not that much later on…). Power Ups are hard to identify – even when it gets hectic.
The good side: best galaga like shooting game on the Vectrex by far. Perfect score animation/visualization. Super cool bonus (minestorm…) levels. Very varied levels and great endboses (and animation/intros).
So what have we here? The AmAzInG number “100” !!! As far for the pcb, graphics and the rest, I can’t simply say a word…Everything look FaNtAsTiC!!! My kind of game ._
Whenever VectorBlade comes in to a physical (cartridge) form, please don’t forget me. Declaring ViViD interesting in being on your list 🙂
Would be great to be on the list for a physical release – this one is simply must have for every shooting fan 😊
Since finishing this project is probably still months away – I have no list yet. But I am sure you will notice when I draw near.
is there a way to follow your blog to be notified when you post again?
Hm.
It’s a “normal” WordPress blog. I didn’t block any features – I even did not configure it much.
It might be that there is an option if you register as a user… But actually I don’t know.
But thanks for the interest!